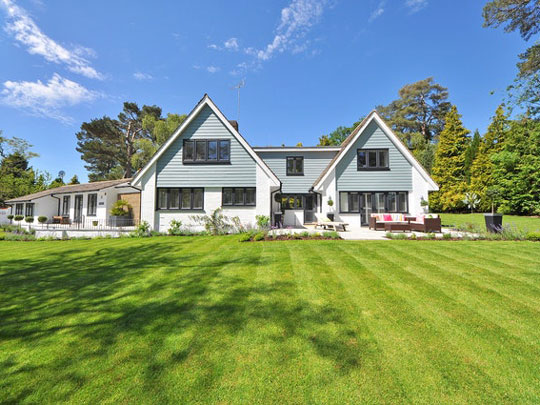
If you own property, whether it’s your own personal residential property or something commercial, nothing is more satisfying than driving up and seeing a beautiful, green, well-manicured lawn. However, as most homeowners know, lawn care and maintenance can be time consuming and expensive over the long term.
Sure it can be fun to mow the grass on a sunny Saturday, but every Saturday for life? Maybe not. There are always issues to deal with, such as pesky weeds, the chemicals needed to eliminate them with, dry or discolored patches to fix, and tools to buy. And of course you have to carve out the time to get it all done.
Some people opt for an easier solution: artificial grass and astroturf!
There are plenty of reasons to install artificial grass or lay artificial turf. It reduces your long-term costs, provides you with beautiful green grass all year, doesn’t dry out, is allergy-free, and it’s also versatile and long-lasting. You can even put in that practice putting green, you’ve always wanted!
For a few tips on how to install artificial grass at your home or place of business, you’re in the right place. Below is a handy guide that will give you all you need to know about the installation of this lush, durable and environmentally friendly alternative to regular grass.
Tool Check

First thing’s first. Unless you want to hire experts to install the grass you’ve purchased, you’ll need to make sure you have the right tools to get the job done. The tools you’ll need will depend on the size of the job. Many of the following tools can be rented or purchased at any hardware store.
- Hand roller or plate tamp
- Shovel, Hoe, Tiller or Sod Cutter
- Crushed stone
- Vibratory or roller compactor
- Seam scrim or adhesive floor tape
- Commercial‐grade adhesive
- Chalk‐line (or spray paint)
- Scissors or razor knife
- A power broom, silica sand and/or granulated rubber, and a drop spreader (for infill installation)
- Landscape spikes (aka nailer board (used for securing the synthetic turf exterior edge from lifting and movement)
Step 1: Area Preparation
As a general would before battle, you should survey the landscape from a bird’s eye view.
Mark the area in your mind, note the direction at which the turf will roll out, and make sure that once work starts, you run the grain of the turn against any slope if possible. Keep in mind how wide the turf you’re using will be. For example, EZ Grass from Oasis Outdoor Products comes in 15-foot widths.
At this point, you should decide where the border will be, and which edging or curbing technique you’ll use.
Step 2: Ground Prep

Now it’s time to remove whatever grass currently occupies the space, as well as any infrastructure like in-ground sprinklers. It is also important to compact the soil (if necessary) before putting down the base, and this can be done using a hand roller or a plate tamp.
If any areas of the ground are saturated with water, it may also be necessary to install a geotextile to separate the soft soils from the next step, the crushed stone base.
Step 3: Laying a Base

Next spread crushed stone evenly over the area, with a maximum particle size of 3/4 of an inch, and compacted. A vibratory compactor will work well in this case.
In climates such as Edmonton, Calgary or Toronto, 4 inches of base material should be sufficient. In places with greater rainfall (like Vancouver) 6 inches may be necessary.
Step 4: Lay Artificial Grass

Now that you’re going to lay the synthetic grass, make sure that if you’re using multiple widths, that all the grass blades on the surface point in the same direction.
To seam the widths together, you’ll need to do two things: First, you’ll need to lay the first roll of grass down in the desired position, but before carefully laying the adjacent piece so that it overlaps the first piece’s edge and creates a natural look, you should roll out seam scrim or adhesive floor tape over the entire length of the seam.
Use scissors or a knife to make trims where necessary to achieve the desired effect, which is a smooth surface that looks like one piece. Be sure to add weight to the seam using sandbags, or run a heavy roller along the seam.
Finally, brush the grass fibers upright, and using a drop-spreader (commonly used to spread grass seed, etc.) pour infill in small quantities evenly over the entire surface. Without enough infill (with too much of the grass fibers exposed, the grass get crushed over time with foot traffic and will experience premature wear and tear.
Step 5: Secure the Edges

While the weight of the infill is often enough to keep the artificial grass in place, if there are trouble areas, you can use a number of techniques to secure the edges.
Use landscape spikes, nailer board, or you can even bury the edges of the turf, hiding the edges with compacted stone, mulch or straw.
For a much more complete step-by-step guide, see here for more information.
Call the Oasis Outdoor Products Artificial Grass Installers

If the steps above seemed like a little too much work, or if you would rather have professionals install your artificial grass, then there are companies that can help. Oasis Outdoor Products is one of those companies.
Since every project is unique, contact them to discuss the artificial grass installation on your property, and they’ll be happy to help. Simply leave your email address or phone number and they’ll set up a meeting right away. For an artificial lawn you can be proud of, call them today!